Best IPTV Solutions for Students & Low-Budget Users

Introduction

Students and budget-conscious viewers have a common problem: the desire for lots of TV (news, sports highlights, sitcoms, anime, documentaries) without the crushing cost of traditional cable or multiple streaming subscriptions. IPTV (Internet Protocol Television) opens doors — it lets you stream live channels and on-demand libraries over the internet, often at a fraction of cable prices. But “IPTV” is an umbrella term that includes fully legal, ad-supported services, low-cost licensed options, community-built setups (like Kodi), and unverified/paywalled services of dubious legality. This guide walks you through smart, safe, and truly affordable IPTV solutions for students and low-budget users, with practical set-ups, money-saving tips, and security advice so you don’t trade a small monthly bill for a headache later.

Quick overview: what “IPTV” can mean for you

In practice, students use IPTV in three main ways:

  1. Legal, ad-supported IPTV apps and channels — free services (e.g., ad-supported streaming channels) that provide live channels and large on-demand catalogs. Great for basic entertainment without spending.

  2. Cheap, licensed paid streaming services — low-cost subscription services offering live TV or large on-demand libraries (some provide free trials and discounted student plans).

  3. Open-source or community solutions — media centers (Kodi, Xbian, etc.) that can play legitimate streams or third-party add-ons; flexible but needs technical know-how and caution about add-ons.

Each approach has tradeoffs: cost, reliability, legality, picture quality, and ease of use. Below we break down the best options and how to get the most value.

Safety and legality: the cardinal rules (read this first)

Before diving into providers: not all IPTV services are equal. Some “cheap” IPTV sellers distribute pirated channel streams and are illegal in many countries. Others are legitimate, licensed services. Two important cautions:

  • Preferring legal/verified sources avoids legal risk and poor reliability. Verified services (big streaming companies, ad-supported platforms) are stable, updated, and won’t suddenly vanish. Unverified sellers often change URLs, freeze connections, or disappear with your money. If a deal sounds too good (hundreds of channels for a few dollars) — be suspicious.

  • Malicious apps masquerading as IPTV or VPNs exist. Security researchers have recently flagged Android apps posing as IPTV/VPN software that actually carry malware capable of stealing credentials and controlling devices — so only install apps from trustworthy stores and check reviews.

Finally, always check the laws in your country and your university’s acceptable use policy. If you want to err on the safe side, use licensed, ad-supported, or student-discounted paid services.

What students should prioritize when choosing an IPTV solution

Students have different priorities than families or heavy-TV users. Here are sensible criteria:

  • Price & flexibility — low monthly cost, monthly billing (not locked into long contracts), free trial options.

  • Device compatibility — works with phones, laptops, and a cheap TV stick (Chromecast/Fire TV/Android TV).

  • Low data options — ability to choose SD or lower bitrate streams to save on data caps.

  • Ease of setup — minimal technical steps; a simple app or web player is best.

  • Portability — watch on campus, buses, or while traveling.

  • Safety & legality — licensed or well-known ad-supported platforms avoid headaches.

Keep these in mind when comparing services below.

The best free / legal IPTV options for students

If you want “free and legal,” here are the highest-value choices. They won’t always offer every live sports feed or premium cable channel, but they deliver enormous entertainment for $0 — with ads.

1. Ad-supported free channel platforms (Pluto TV, The Roku Channel, Tubi, Samsung TV Plus)

These platforms provide dozens — sometimes hundreds — of live channels and large on-demand libraries, supported by ads. They work on phones, web browsers, smart TVs, best IPTV solutions students and TV sticks. Their quality is generally reliable, and setup is plug-and-play.

  • Why students like them: zero cost, no account (or simple account), works on cheap hardware, lots of films, niche channels (retro TV, anime, factual channels).

  • Where to get them: app stores (Google Play, Apple App Store), smart TV app stores, or via web players.

  • Example: The Roku Channel is available as a legal free source of hundreds of channels and thousands of movies — you can use the app on many devices without owning a Roku device.

These are the best first step for anyone on a tight budget.

2. Network apps + local public broadcasters

Many networks and public broadcasters stream content for free with advertising or limited live news channels. Check local broadcaster apps (e.g., BBC iPlayer in the UK, PBS in the US, local news apps) — often free for viewers in region.

Low-cost licensed paid IPTV & streaming that make sense for students

Sometimes a small monthly payment unlocks far better content (sports, live news, cloud DVR). Here are categories that frequently deliver strong value.

1. Budget live-TV streaming services (student trials & promos)

Major live TV streamers (YouTube TV, Sling, Hulu + Live TV, fuboTV) can be pricey, but they sometimes offer student discounts, limited channel packages, or promotions. If you only need a few channels, best IPTV solutions students Sling’s base packages or a trimmed-down fubo plan can be cheaper than full cable. Always compare: monthly price × number of users × DVR needs.

  • Pro tip: use monthly plans or free trial windows to test which service covers the channels you actually watch — don’t sign up for a long annual plan until you’ve tested compatibility and quality. Verified providers frequently offer free trials.

2. Niche subscriptions for targeted needs

If you mainly want sports, consider sport-specific services (ESPN+, Fubo’s sports tier) or the league’s official streaming (some leagues provide low-cost student passes). For anime fans, services like Crunchyroll or Funimation (or regionally available bundles) can be the cheapest route to watch legally.

3. Bundles and student discounts

Some platforms offer student discounts on bundles (e.g., Spotify + Hulu historically). Always check student verification via UNiDAYS or SheerID — you can often save substantially.

DIY & open solutions (for technically comfortable students)

If you like tinkering, several low-cost set-ups allow broad functionality. These require more work and attention to legality.

1. Kodi (and other media centers)

Kodi is a free, open-source media center that plays local files, streams, and supports add-ons. The recent Kodi 22 release improved the PVR and device compatibility — making it more suitable for lower-power devices. But: many third-party Kodi add-ons stream unlicensed content; best IPTV solutions students stick to legal add-ons and repos.

Why use Kodi: highly customizable UI, runs on a low-cost Raspberry Pi or old laptop, supports local recordings and EPG, and can unify multiple legal sources (local files + official streaming add-ons).

Caveat: Installing unknown third-party add-ons risks piracy and malware. Keep Kodi up to date and use only reputable repositories.

2. Cheap hardware + cast/mirroring

Combine a cheap Android TV stick (US$20–40), an inexpensive Wi-Fi router, and your smartphone as a remote. Most legal IPTV apps have Android/Fire TV versions — this is the simplest way to get IPTV onto a TV without buying a pricey set-top box.

3. Raspberry Pi media server

For tech students, a Pi 4 as a headless media server that runs Kodi/OSMC or Jellyfin (self-hosted) is a low-power, one-time cost solution. Jellyfin lets you stream your own library and some legal plugins — but it requires setup effort.

How to get the best streaming quality on a budget

Students often have flaky dorm internet or tight data caps. Here are practical steps to maximize viewing quality without spending more:

  1. Choose SD or adaptive streaming when possible. Most apps let you switch quality — 480p uses far less bandwidth than 1080p and still looks fine on small screens.

  2. Use wired Ethernet or 5GHz Wi-Fi when available. Dorm Wi-Fi can be congested; a wired connection or 5GHz band reduces buffering.

  3. Limit background devices during peak times. If your roommate is torrenting, best IPTV solutions students your stream will suffer.

  4. Use a basic cache/accelerator on devices that allow it (some Android TV ROMs). Not essential, but can help with microbuffering.

  5. Test with the provider’s free trial to confirm quality on your actual connection.

Security, privacy, and avoiding scams

For students on campus networks or shared housing, privacy matters. Here’s what to do:

  • Install only official apps from Google Play, Apple App Store, or the smart-TV store. Avoid downloading random APKs or installing packages from unknown sites — some are malicious. Security researchers recently found trojans packaged as IPTV/VPN apps that steal banking data and control devices, so caution is essential.

  • Check reviews and recent update dates — apps that no longer receive updates are riskier.

  • If using a VPN: choose reputable, paid VPNs — free VPNs often monetize in harmful ways. Use a VPN if your campus blocks streaming or if you need privacy, best IPTV solutions students but verify the VPN allows streaming (some block streaming sites). Private Internet Access has a practical guide on using IPTV safely and how to set up players and apps.

  • Don’t use obviously pirated services even if cheap; local ISPs may block them and payments to unverified sellers often go to anonymous crypto wallets without recourse.

Best-of lists: recommended setups for common student profiles

Below are realistic configurations for differing budgets and needs.

A. The absolute-zero-budget student — Free, legal streaming

  • Apps: Pluto TV, The Roku Channel, Tubi, Samsung TV Plus (where available).

  • Hardware: phone or laptop; for TV, a cheap Chromecast with Google TV (~US$25) or Fire TV Stick Lite.

  • Why: zero monthly cost, easy setup, legal.

B. The frugal student who wants live TV — Low-cost paid + free mix

  • Apps/Services: Sling (small packages), low-tier fubo or YouTube TV when on promotion, and ad-supported free apps for secondary viewing. Use student discounts where available.

  • Hardware: Fire TV Stick, used Android TV box, or Chromecast.

  • Why: Keeps monthly cost low while covering needed live channels.

C. The tinkerer/student developer — Kodi + Raspberry Pi / Jellyfin

  • Set-up: Raspberry Pi 4 with Kodi or Jellyfin; legal add-ons; local media storage + cheap TV stick for living room.

  • Why: One-time hardware cost; highly customizable; ideal if you like building things.

D. The sports-first student — Targeted sports pass + free supplements

  • Set-up: Subscribe only to the sport league pass you need (student discounts may exist) and combine with free ad-supported apps for other entertainment.

  • Why: Sports are expensive; pay only for what you use.

Money-saving tactics students often miss

  • Share family plans legally — some licensed services allow household sharing; split costs with roommates or family (obey terms of service).

  • Rotate subscriptions — keep one paid live service for the months you need (e.g., sports season) and subscribe month-to-month; in off-season, switch to free apps.

  • Trade streaming time for price — accept SD streaming on shared plan to lower data usage.

  • Use bundled offers — telco or mobile plans sometimes include free streaming when you’re a customer; always check student bundles.

  • Use free trials wisely — test several services in rotation (but cancel before trial ends if you don’t want to pay). Verified guides list many free trial options to test providers risk-free.

Sample monthly budgets (realistic)

  • $0/month: free ad-supported apps only (Pluto, Roku Channel, Tubi).

  • $3–7/month: Sling’s smallest package or partial paid niche service; plus free apps.

  • $10–20/month: decent live-TV base plan from budget providers (or a rotation of premium services during needed months).

  • One-time hardware: Chromecast / Fire TV Stick (~US$20–40) or Raspberry Pi (~US$35–60 depending on model & accessories).

Remember: vendors and prices change, so always check current offers and free trials before committing.

Common student FAQs

Q: Will IPTV use my mobile data quickly?
A: Yes — streaming uses significant data. SD uses around 0.7–1.5 GB/hour, 720p around 1.5–3 GB/hour, and 1080p 3–5 GB/hour. Choose lower quality when on mobile plans.

Q: Can I watch on campus Wi-Fi?
A: Often yes, but university networks may block streaming or throttle video. Use wired connections or check with IT. If blocked, a reputable VPN may help — but check the university’s policy first.

Q: Is Kodi illegal?
A: Kodi itself is legal software. It becomes problematic when used with add-ons that provide unlicensed channels or pirated content. Stick to legal repositories and official add-ons.

Final checklist before you subscribe or install anything

  • Check whether the service is licensed and reputable.

  • Compare monthly vs. annual pricing and lock-in risks.

  • Use free trials to test on your device and network.

  • Install apps only from official stores and check recent security warnings about malicious IPTV apps.

  • Prefer services that let you choose stream quality to manage data.

  • If you build a DIY solution (Kodi/Pi), ensure you update and limit add-ons to trusted repos.

Conclusion — smart, safe, and cheap IPTV is possible

Students don’t have to accept expensive cable bills. With a mix of ad-supported free platforms, selective low-cost subscriptions, and a little technical savvy (when you want it), you can create a highly affordable IPTV experience. Prioritize legality and device security — the vast majority of value comes from legitimate free apps (Pluto, Roku Channel, Tubi) combined with short, targeted paid subscriptions during peak months. Test services using free trials, be skeptical of unbelievably cheap “hundreds of channels for $3” offers, and protect your device from malicious APKs. Do this, best IPTV solutions students and you’ll have a lightweight, portable, and wallet-friendly TV setup that fits student life.

IPTV FREE TRIAL

Setting Up IPTV on Your Device: A Step-by-Step Tutorial

Introduction

Setting up IPTV on your device has never been easier — whether you’re using a smart TV, smartphone, tablet, or streaming box. IPTV (Internet Protocol Television) lets you watch live TV, movies, and on-demand content directly through your internet connection, eliminating the need for traditional cable or satellite services. In this step-by-step tutorial, we’ll guide you through everything you need to get started — from choosing the right IPTV service and app to configuring playlists, improving streaming quality, and troubleshooting common issues.

1. What is IPTV — quick primer

IPTV stands for Internet Protocol Television. Instead of receiving television channels through satellite dishes, cable coax, or terrestrial broadcast, IPTV delivers video streams over an IP network — usually your home internet. IPTV can provide live TV, time-shifted TV (catch-up), and video-on-demand (VOD).

There are many legitimate IPTV providers (broadcasters with apps, telcos with IPTV platforms, licensed OTT services). Unfortunately, there are also unlicensed services that distribute copyrighted channels and content without permission — avoid those.

This guide focuses on setting up legal IPTV services on common devices. The technical steps are similar for both legal and illegal sources — so always choose legitimately licensed services.

2. Is IPTV legal? A short, important note

Short answer: Yes — IPTV itself is legal. Many major broadcasters and telecom companies use IPTV to deliver content (e.g., Sky Q’s internet features, BT TV, BBC iPlayer, Netflx, Disney+ over IP). What matters legally is the content provider and whether the streams are licensed.

Do not use playlists or services that offer paid channels (like premium sports and movies) for free or that distribute copyrighted content without permission. Using or redistributing such streams can be illegal in many jurisdictions.

Before subscribing or configuring IPTV:

  • Confirm the provider is legitimate and licensed to show the channels you want.

  • Read the provider’s terms and privacy policy.

  • Avoid sharing or hosting M3U (playlist) files from unknown or infringing sources.

3. What you’ll need before you start

Hardware & accounts:

  • The device you want to use (phone, tablet, smart TV, streaming stick, PC, set-top box).

  • A legitimate IPTV subscription (or access to free legal streams). Provider should give you an account, username/password, or a URL playlist (M3U/XTREAM/portal).

  • If your provider uses a portal or app, they’ll supply login details or a smart card/activation code.

Network:

  • A broadband connection. For standard definition (SD) ~2–4 Mbps; for HD ~5–8 Mbps; for Full HD (1080p) ~8–12 Mbps; for 4K (UHD) ~25+ Mbps per stream.

  • Ethernet (wired) connection for best reliability. Wi-Fi is okay if strong (5 GHz preferred).

Software:

  • An IPTV client app compatible with your device and playlist type (examples later).

  • Media players (e.g., VLC) for testing.

Accessories (optional but useful):

  • Ethernet adapter for devices without wired ports (USB-Ethernet for some Android TV boxes; Lightning/USB-C to Ethernet for iPad/phones).

  • External storage or NAS if you plan to record content.

  • VPN (only if you have privacy reasons and the provider allows it — note VPNs won’t legalize pirated streams).

Credentials & files:

  • Your M3U URL or file, or Xtream Codes / portal URL and login, or provider’s official app credentials.

  • EPG URL (often XMLTV) if you want channel guides.

4. Choosing the right IPTV service and playlist format

Common formats you might receive from a legitimate provider:

  • M3U (playlist file or URL) — one of the most common. Contains channel stream URLs and metadata.

  • Xtream Codes / API — some providers give an API-style login (server, username, password). Apps like IPTV Smarters accept these.

  • Portal URL / STB emulation — used by set-top boxes; provider gives a portal link.

  • Native apps — some providers offer apps in app stores (recommended when available).

Pick a client app that supports the format your provider uses.

Reputable client apps (examples — choose based on device/OS):

  • TiviMate (Android TV) — excellent EPG support and modern UI (paid pro features).

  • IPTV Smarters / Smarters Pro — widely used, supports Xtream and M3U.

  • Perfect Player — Android and some TV boxes.

  • VLC / MX Player — universal media players for PCs and Android.

  • Kodi (with PVR IPTV Simple Client) — highly configurable.

  • Native provider apps — best if your provider has one in Google Play, Amazon Appstore, or TV app stores.

Avoid downloading random, unverified IPTV apps from untrusted websites — they can contain malware. Use official app stores when possible.

5. Network & hardware preparation (speed, router tips, QoS)

Good networking reduces buffering and improves reliability.

  1. Test your internet speed — do this on the device you’ll use most. For example, use a speed test app on the phone or PC. Ensure download speeds meet your needs (see earlier bitrate guide).

  2. Prefer wired (Ethernet) when possible — less interference than Wi-Fi. Use CAT5e or better.

  3. If using Wi-Fi:

    • Use 5 GHz band for higher throughput and less interference.

    • Place router close to the device or use a mesh system.

    • Reduce interference (microwaves, other networks, thick walls).

  4. Router settings:

    • Enable IGMP snooping and multicast support if your provider uses multicast streams (less common for consumer IPTV).

    • Set up Quality of Service (QoS) to prioritize streaming traffic if your router supports it.

    • Ensure UPnP or port forwarding is set per provider requirements (rarely needed for simple playback).

    • Disable bandwidth-hungry devices during initial setup & testing.

  5. Network MTU / buffering tweaks: Advanced users can tweak MTU or player buffer sizes in some apps for unstable networks — we’ll cover this under troubleshooting.

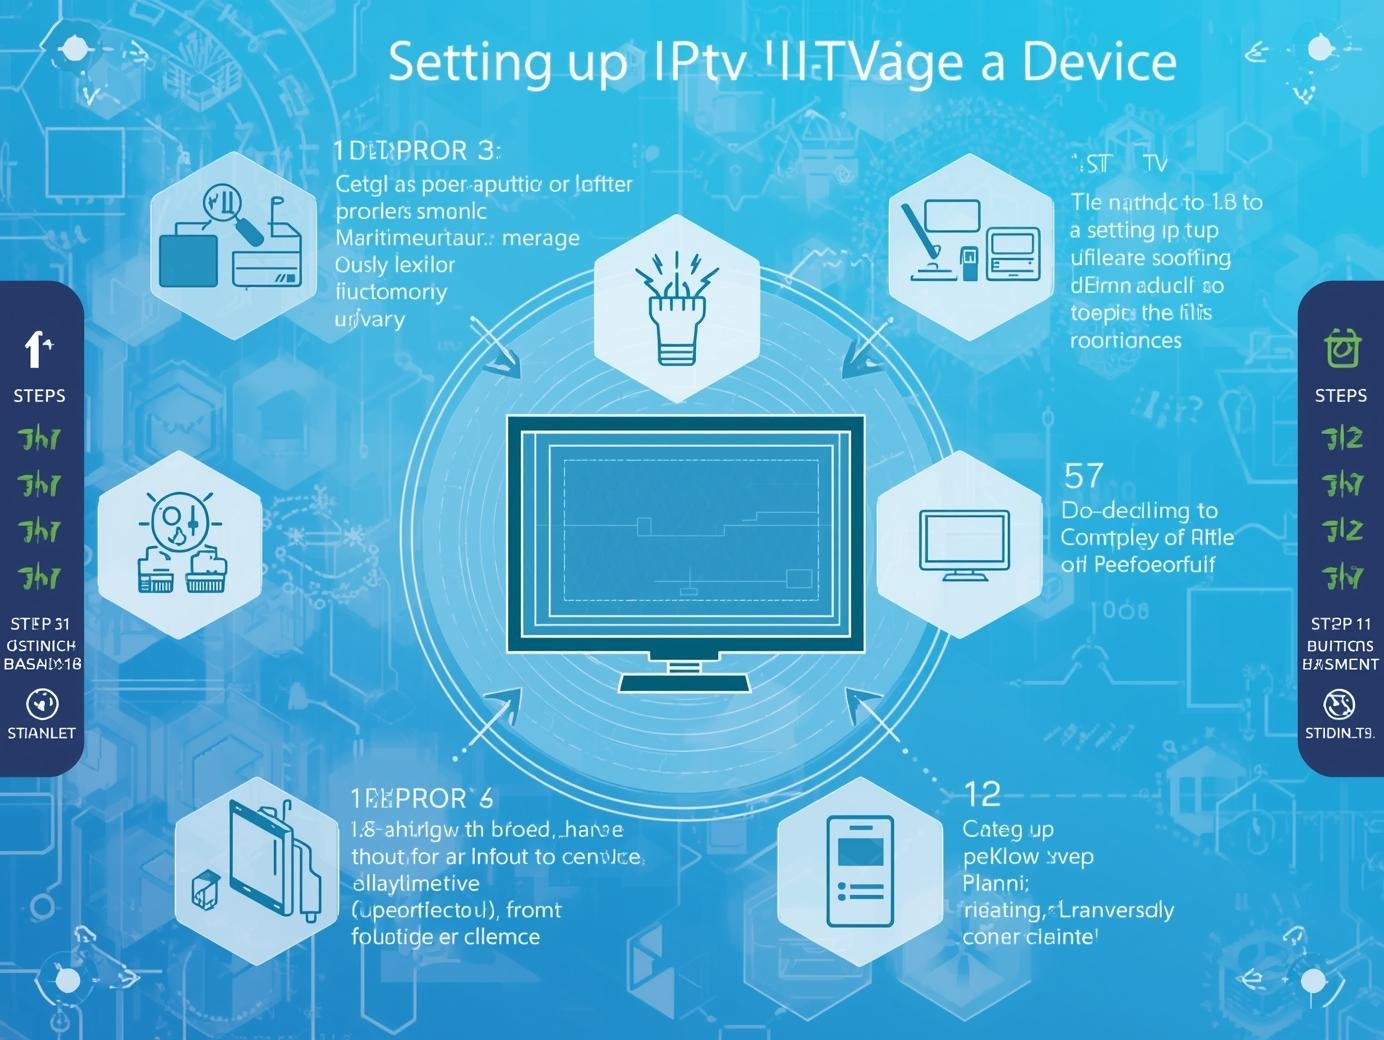
6. Step-by-step setup: device-by-device walkthroughs

Below are device-specific, sequential steps. For each device, I’ll cover: choosing the app, installing, adding a playlist/credentials, testing playback, and tips.

Android phones & tablets

Best when: You want mobility and a large app selection.

Recommended apps: VLC, IPTV Smarters, Perfect Player, OttPlayer, XCIPTV.

Steps:

  1. Install the app: Open Google Play → search the app (e.g., “IPTV Smarters”) → Install.

  2. Get provider details: Have your M3U URL or Xtream login ready. If the provider sent an M3U file, either:

    • Copy the M3U URL, or

    • Download the M3U file to your device.

  3. Open the IPTV app → Add new playlist/account:

    • For M3U URL: choose “Add playlist” → paste the URL → give it a name → Save.

    • For Xtream (server/username/password): choose “Login with Xtream” or “Add account” → enter credentials → Save.

  4. Load EPG (optional):

    • In app settings, find “EPG” or “Guide” → paste EPG URL if provided → map channels if necessary.

  5. Play a channel: Open the channel list → select a channel → wait for buffer → it should start.

  6. If buffering or failing: Try switching player engine (many apps offer internal or external players like VLC). Use the Android Settings → App → Permissions to allow storage/network access if needed.

Tips:

  • Use screen rotation lock if you prefer landscape.

  • Most apps support casting (Chromecast) if you want to send video to a TV.

  • Use a file manager to organize downloaded M3U files.

iPhone & iPad (iOS)

Best when: You want a polished, secure experience on Apple devices.

Recommended apps: VLC for Mobile, GSE Smart IPTV, IPTV Smarters (iOS version), nPlayer.

Steps:

  1. Install the app: App Store → search (e.g., “GSE Smart IPTV”) → Install.

  2. Obtain playlist/auth details: Have M3U URL or Xtream server/username/password.

  3. Add M3U or Xtream:

    • In the app → Playlists → Add (M3U or Xtream) → paste details → Save.

  4. Enable local network access: iOS may prompt permission for local network — allow it to let the app discover devices and access local network.

  5. Play channel & test: Select a channel → buffering may occur initially.

iOS specifics:

  • iOS restricts background activity — some apps may pause when the device locks.

  • AirPlay may work differently depending on the app; some apps disable direct AirPlay.

Android TV & Google TV (Nvidia Shield, Sony, Xiaomi)

Best when: You want a TV-first experience with remote control and large screen UI.

Recommended apps: TiviMate (premium features), IPTV Smarters, Perfect Player, Smart IPTV (where available).

Steps:

  1. Install the app: Google Play Store on TV → search for chosen app → Install.

  2. Add playlist/credentials: Open app → Add playlist → paste M3U or Xtream credentials.

  3. EPG mapping: TiviMate excels in EPG management — import EPG URL if provided.

  4. Test playback: Use remote to select a channel — TiviMate and other TV players usually include buffering and player settings.

  5. External player options: If playback stutters, IPTV setup step tutorial try using an external player (MX Player) if the app supports it.

Tips:

  • For Android TV boxes without Play Store, sideload the APK carefully from trusted sources. Enable “Unknown sources” temporarily.

  • TiviMate’s UI is optimized for remotes and supports favourites, recording (with external storage in some cases), and multi-EPG profiles.

Amazon Fire TV / Fire Stick / Fire TV Cube

Recommended apps: IPTV Smarters (available on Amazon Appstore in many regions), IPTV setup step tutorial Downloader + sideload option for others, TiviMate (limited availability), VLC.

Steps:

  1. Search Appstore: If the app is available, install from Amazon Appstore.

  2. If not available: Use Downloader app to download official APK (only from trusted sources). Enable “Install unknown apps” for the downloader.

  3. Open app → Add playlist/Xtream as described earlier.

  4. Using remote: Some apps are designed for touch; use mouse toggle apps or remote mapper. TiviMate is best but check availability.

Tip: Fire TV sometimes has stricter app availability by region. Sideloading is common; only install APKs from trustworthy sources.

Smart TVs (Samsung Tizen, LG webOS)

Native provider apps are best: If your IPTV provider has an app in the TV’s app store, use that — it’s usually the most stable and optimized.

If no native app available:

  • Many smart TVs don’t allow installing arbitrary Android apps. Options:

    • Use Chromecast / AirPlay from your phone/tablet to the TV.

    • Use a connected streaming device (Amazon Fire TV, Android TV) or a small set-top box.

    • Some TVs allow browser playback, IPTV setup step tutorial but this is hit-or-miss.

Samsung / LG specific:

  • Samsung Tizen and LG webOS accept apps from their stores — search for official IPTV clients.

  • If your TV supports DLNA/UPnP, you can stream from a PC or NAS.

Windows PC & macOS

Recommended players: VLC, Kodi, IPTV Smarters Desktop (Windows), Perfect Player, ProgDVB (Windows).

Steps (VLC example):

  1. Install VLC: Download from official site (for safety).

  2. Open playlist:

    • M3U URL: Media → Open Network Stream → paste URL → Play.

    • M3U file: Media → Open File → select M3U.

  3. Performance tips: Use wired Ethernet for best stability. Increase VLC caching: Tools → Preferences → Input / Codecs → set “Network caching (ms)” to a higher value (e.g., 1000–3000ms) for unstable connections.

Kodi (recommended if you want an integrated PVR):

  • Install Kodi → Add “PVR IPTV Simple Client” add-on → configure with M3U and EPG URLs → enable → channels will appear in TV menu.

Linux & Raspberry Pi (Kodi)

Raspberry Pi is great for a low-cost IPTV client. Many people run LibreELEC (Kodi distribution) or OSMC.

Steps (LibreELEC / Kodi):

  1. Install LibreELEC/OSMC on SD card → boot Pi → run Kodi.

  2. Configure PVR IPTV Simple Client:

    • Add M3U URL and EPG URL in add-on settings.

    • Enable the add-on → Kodi will populate the channels and guide.

  3. Hardware acceleration: Enable hardware decoding in Kodi settings for smoother playback.

Linux Desktop:

  • VLC and Kodi work similarly to other desktops. Use hardware acceleration (VA-API or VDPAU) where possible.

Dedicated IPTV set-top boxes (MAG, Formuler, etc.)

These boxes often emulate STBs and expect provider portal URLs or will use Xtream codes. Many are preconfigured by vendors or ISPs.

General steps:

  1. Plug into TV & network (Ethernet recommended).

  2. Power on and follow initial setup.

  3. Enter portal URL or login details supplied by provider (Settings → Server/Portal).

  4. Wait for channels to populate — this may take a minute.

  5. Update firmware if instructed by the manufacturer (only get firmware from the official vendor).

Tip: Avoid third-party firmware unless you fully understand risks (bricking, security).

OTT boxes and streaming sticks (generic)

Principles are the same: install a compatible app, add playlist or credentials, ensure network is strong.

Important: If you plan to use a streaming stick regularly for IPTV, IPTV setup step tutorial consider using an Android TV device rather than entry-level sticks for better app compatibility and performance.

7. Electronic Program Guide (EPG) & subtitles

EPG (Guide):

  • EPG provides program names, times, and descriptions.

  • Providers may supply an XMLTV URL or a preconfigured EPG inside their portal.

  • Most IPTV apps let you import an EPG URL. Then you’ll often need to map channels if channel IDs differ between the M3U list and the EPG.

Subtitles (closed captions):

  • Subtitle availability depends on the stream. Some providers embed subtitles in the stream; others offer separate subtitle files.

  • Media players like VLC and Kodi allow you to enable subtitles or point to external subtitle files.

Time zones: EPG data may be in UTC — set the app’s timezone offset if things look shifted.

8. Improving reliability & picture quality

Why buffering occurs: Network bandwidth spikes, Wi-Fi interference, IPTV setup step tutorial or server congestion.

Practical steps:

  1. Use wired Ethernet for primary streaming device.

  2. Increase player buffer size (many apps have buffer settings — raise it if your connection fluctuates).

  3. Choose a lower bitrate stream if your internet is limited; some providers offer multiple stream qualities.

  4. Close background downloads/updates on other devices in your network.

  5. Change codec/decoder settings: Hardware decoding is faster on supported devices (enable it when available).

  6. Try different player engines within the app (internal vs external like VLC or ExoPlayer).

  7. Split traffic with QoS — give streaming priority on the router.

  8. If server is slow: contact provider or test with a known working public stream to isolate issue.

9. Security, privacy, and parental controls

Security best practices:

  • Use official apps from app stores when possible.

  • Keep apps and device firmware updated.

  • Don’t install APKs from unknown websites.

  • Use strong, unique passwords for provider accounts.

  • If you must use a VPN for privacy, choose a reputable VPN provider and ensure usage complies with your IPTV provider’s terms (some providers block VPN traffic).

Privacy:

  • Legitimate IPTV providers log usage — review privacy policy.

  • Avoid sharing sensitive account credentials in public forums.

Parental controls:

  • Many IPTV apps include parental control pins to block channels.

  • Use your device’s native parental control features (smart TV profiles, Android restricted profiles, IPTV setup step tutorial iOS Screen Time).

  • Some apps allow filtering by category or rating.

10. Troubleshooting common problems (stepwise checks)

If playback fails or quality is poor, follow this checklist in order:

  1. Check the network:

    • Can you browse the web? Test speed.

    • If using Wi-Fi, move device closer to router.

  2. Confirm provider/account:

    • Are your login details correct?

    • Has your subscription expired?

  3. Verify playlist/URL:

    • Paste the M3U URL into VLC on a PC — does it play?

    • If the M3U file fails on multiple devices, the issue may be the provider.

  4. Try another app/player:

    • If one app fails, test with VLC, Kodi, IPTV setup step tutorial or another IPTV client.

  5. Check app permissions:

    • Storage, network, background activity.

  6. Increase buffer/cache settings in player settings.

  7. Switch decoder settings: Try enabling/disabling hardware acceleration.

  8. Reboot devices: Router, streaming device, and TV. Power cycling resolves many transient issues.

  9. Firmware and app updates: Ensure both are up to date.

  10. Contact provider: If everything seems correct on your side, IPTV setup step tutorial contact the provider — they may be experiencing server issues.

Specific errors & quick fixes:

  • No sound: Check volume/mute, audio track settings, and player audio output (HDMI vs TV speakers).

  • Channels missing: Playlist updated? EPG mismatch? Try refreshing playlist or reimporting EPG.

  • Frequent disconnects: Test with wired connection; check ISP stability.

11. Advanced tips

Recording IPTV:

  • Some apps or set-top boxes support recording (DVR). Requirements:

    • Enough local/NAS storage.

    • Provider’s streams permit time-shifting.

  • Kodi + PVR backends (like NextPVR) can record on PCs.

Integrating IPTV into Kodi:

  • Use PVR IPTV Simple Client for M3U and EPG.

  • For advanced channel management, IPTV setup step tutorial combine with Kodi PVR backends.

Using external players for better decoding:

  • Install MX Player or VLC on Android devices and configure your IPTV app to use external player for improved decoding of certain codecs.

Custom channel organization:

  • Many apps let you create favourites and group channels.

  • Use M3U editors on PC to reorder channels or remove duplicates (only for legal playlists you own).

Stream testing & bandwidth estimation:

  • Use VLC to view codec info (Tools → Codec Information) to check stream bitrate and resolution.

  • If you see high bitrate (e.g., 15–25 Mbps), IPTV setup step tutorial expect 4K or high-quality HD.

12. FAQ — short answers to common questions

Q: Can I use a VPN with IPTV?
A: Yes for privacy, but check provider terms — some block VPNs. VPNs can add latency; choose a VPN server near your location.

Q: Can I play IPTV on multiple devices at once?
A: Depends on provider. Many limit concurrent streams. Check subscription plan.

Q: My provider only gave a username/password — how do I enter it?
A: Use an app that supports Xtream Codes/API or the provider’s official app. Enter server URL + username + password.

Q: Why does my EPG show wrong times?
A: Timezone mismatch. Adjust app timezone settings or use a timezone-aware EPG.

Q: Can I record channels?
A: Only if the app/box supports DVR and streams permit recording. Some providers disable recording for rights reasons.

Q: Is it safe to sideload an IPTV APK?
A: Only if sourced from a reputable developer. Unknown APKs can contain malware — prefer official stores.

13. Final checklist & recommended reading

Quick pre-launch checklist:

  • Confirm that your IPTV provider is legitimate and you have valid credentials.

  • Ensure your internet speed meets the stream quality requirements.

  • Prefer wired Ethernet for the primary device.

  • Install a reputable IPTV client app for your device.

  • Input M3U/Xtream/portal details exactly as provided.

  • Import EPG if available and map channels.

  • Test multiple channels and one continuous playback for 15–30 minutes.

  • Configure parental controls and privacy settings.

  • Keep provider support contact handy.

Further reading & resources (topics to search for):

  • Official docs for your IPTV app (TiviMate / IPTV Smarters / Perfect Player / Kodi PVR)

  • Provider’s welcome/setup guide and FAQ

  • Router documentation for enabling QoS and IGMP

  • Basic home networking and Wi-Fi optimization guides

Closing notes — keep it legal and enjoyable

IPTV is a powerful, flexible way to enjoy broadcast and on-demand content. The setup process is straightforward once you have the right playlist and a stable network. Always prioritize legal providers to avoid risk, IPTV setup step tutorial and use reliable apps and a good home network to minimize buffering and maximize picture quality.

IPTV FREE TRIAL

Step-by-Step Guide to Install IPTV on Any Device

Step-by-Step Guide to Install IPTV on Any Device. Television and video consumption have changed drastically in the past decade. Traditional cable and satellite TV are steadily giving way to Internet Protocol Television (IPTV), a technology that delivers content through the internet. IPTV is popular because it provides affordable access to thousands of live TV channels, movies, sports, and on-demand content—all without being tied to a cable or satellite contract.

The flexibility of IPTV is unmatched. You can watch it on a smart TV, streaming device, mobile phone, tablet, computer, or even a gaming console. However, new users often get confused about how to install IPTV on different devices.

This step-by-step Guide to Install IPTV will walk you through the process of installing IPTV on any device, explain the tools you’ll need, and provide troubleshooting tips to ensure a smooth experience.

1. What You Need Before Installing IPTV

Before diving into device-specific steps Guide to Install IPTV, you’ll need a few things ready:

  1. A Reliable IPTV Subscription

    • Choose a legal and trusted IPTV provider that offers the channels and features you need. Premium IPTV services in the UK, US, and worldwide usually come with Electronic Program Guide (EPG), Video on Demand (VOD), and stable streams.

  2. Stable Internet Connection

    • For smooth streaming:

      • Standard Definition (SD): 5 Mbps

      • High Definition (HD): 10 Mbps

      • 4K Ultra HD: 20–25 Mbps minimum

  3. An IPTV Player or App

    • Examples: TiviMate, IPTV Smarters Pro, GSE Smart IPTV, VLC Media Player, Perfect Player.

  4. M3U Playlist or Xtream Codes Login

    • Provided by your IPTV service. These allow you to load and watch channels.

With these essentials in hand, you’re ready to install IPTV on your device.

2. How to Install IPTV on a Smart TV

Most modern smart TVs (Samsung, LG, Sony, and Android TVs) allow IPTV apps to be installed directly from their app stores.

Steps for Samsung/LG (WebOS or Tizen OS):

  1. After turning it on, connect your Smart TV to the internet.

  2. Open the TV App Store (Samsung Smart Hub or LG Content Store).

  3. Search for Smart IPTV or “SS IPTV”.

  4. Download and install the app.

  5. Open the app, and note the MAC address displayed on the screen.

  6. Go to the IPTV app’s official website on your computer/phone.

  7. Enter the MAC address and upload your M3U playlist URL.

  8. Restart the app, and your channels will load.

Steps for Android Smart TVs:

  1. Go to the Google Play Store.

  2. Search and install IPTV Smarters Pro or TiviMate.

  3. Open the app, select Xtream Codes API or M3U playlist.

  4. Enter your IPTV credentials.

  5. Channels and VOD will appear, ready to stream.

Tip: For better performance, always keep your Smart TV firmware updated.

3. How to Install IPTV on Amazon Firestick & Fire TV

The Amazon Firestick is one of the most popular devices for IPTV streaming because it’s affordable and portable.

Steps:

  1. Connect your Firestick to the TV and Wi-Fi.

  2. Navigate to Settings > My Fire TV > Developer Options from the Firestick’s home screen.

  3. Enable Apps from Unknown Sources.

  4. Go back to the home screen and search for Downloader app.

  5. Install Downloader, open it, and enter the IPTV app URL (for example, IPTV Smarters APK).

  6. Download and install the app.

  7. Launch IPTV Smarters, log in with your IPTV details (Xtream Codes or M3U).

  8. Start streaming live TV or on-demand content.

Bonus Tip: Use a VPN on Firestick to protect your privacy and avoid ISP throttling.

4. How to Install IPTV on Android Phones & Tablets

Android devices are the easiest for UK IPTV because they support many apps directly from the Play Store.

Steps:

  1. Open Google Play Store.

  2. Search for IPTV Smarters Pro, GSE Smart IPTV, or Perfect Player.

  3. Install your chosen app.

  4. Choose Load Playlist or File/URL while the program is open.

  5. Enter your IPTV subscription details (M3U or Xtream Codes).

  6. The channel list will appear. Choose and start streaming.

Advantages:

  • You can cast content to Chromecast-enabled TVs.

  • Supports push notifications and background playback.

5. How to Install IPTV on iPhone & iPad (iOS Devices)

Apple devices are slightly restrictive, but IPTV UK apps are still available.

Steps:

  1. Open the Apple App Store.

  2. Search for GSE Smart IPTV or IPTV Smarters Player.

  3. Download and install the app.

  4. Open the app, then select Remote Playlists > Add M3U URL.

  5. Enter your IPTV provider details.

  6. Save and refresh. The channel list will load.

Note: Apple sometimes removes IPTV apps. If your app disappears, you can sideload apps using a tool like AltStore.

6. How to Install IPTV on Windows & Mac (PC/Laptop)

Many people prefer watching IPTV on their laptops or desktops for bigger screens and multitasking.

Using VLC Media Player (Cross-Platform):

  1. Download and install VLC Media Player from the official website.

  2. Open VLC, click Media > Open Network Stream.

  3. Paste your M3U playlist URL.

  4. Click Play, and channels will begin streaming.

Using IPTV Smarters (Windows/Mac Version):

  1. Download IPTV Smarters Pro from its official site.

  2. Install and open the app.

  3. Select Login with Xtream Codes API or upload an M3U file.

  4. Channels, movies, and series will appear.

7. How to Install IPTV on Roku Devices

Roku doesn’t officially support IPTV apps, but you can still use them with a workaround.

Steps:

  1. On your Roku, go to Settings > System > Screen Mirroring and enable mirroring.

  2. On your Android or Windows device, install IPTV Smarters or GSE IPTV.

  3. Play IPTV content on your device.

  4. Use Cast/Screen Mirror to project it to Roku.

Note: This method depends on mirroring, so stability may vary.

8. How to Install IPTV on MAG Box

MAG Boxes (from Informer) are popular IPTV set-top boxes.

Steps:

  1. Connect MAG Box to your TV and internet.

  2. Go to Settings > System Settings > Servers > Portals.

  3. Enter Portal 1 name (e.g., IPTV UK) and the Portal URL provided by your IPTV provider.

  4. Save and restart the box.

  5. The IPTV portal will load automatically with channels.

9. How to Install IPTV on Enigma2 (Linux-based Receivers)

Enigma2 devices are advanced satellite/terrestrial/cable receivers that can also run IPTV.

Steps:

  1. Install a tool like Dreambox Control Center (DCC) on your PC.

  2. Connect your Enigma2 box and PC to the same network.

  3. Use DCC to access the device.

  4. Upload your M3U playlist

  5. Restart the box, and IPTV channels will appear in the bouquet list.

10. How to Install IPTV on Xbox & PlayStation

Gaming consoles double up as streaming devices.

On Xbox:

  1. Open the Microsoft Store.

  2. Download MyIPTV Player.

  3. Open the app and go to Settings > Add New Playlist.

  4. Enter your M3U playlist URL.

  5. Channels will load, and you can start streaming.

On PlayStation (PS4/PS5):

  1. Open the PlayStation Store.

  2. Install Plex or Kodi.

  3. Configure IPTV add-ons in Kodi or playlists in Plex.

  4. Start streaming IPTV.

11. Common Issues & Troubleshooting

Even with proper setup Guide to Install IPTV, you might face issues. Here are solutions:

  • Buffering → Check internet speed, use a wired connection, or enable Adaptive Bitrate.

  • Invalid M3U Playlist → Ensure your subscription is active and the link is correct.

  • App Crashing → Update the app or reinstall it.

  • Black Screen / No Sound → Try a different player (e.g., VLC or MX Player).

  • Blocked IPTV URL → Use a VPN to bypass ISP restrictions.

12. Safety and Legal Considerations

While IPTV legal when used with licensed providers, many “free” or pirated IPTV services exist, which may carry risks:

  • Copyright Infringement → Using unlicensed IPTV may result in legal penalties.

  • Security Risks → Free IPTV links often contain malware.

  • ISP Throttling → Internet providers may block suspicious IPTV servers.

Recommendation: Always choose a legitimate IPTV service that operates within the law.

13. Tips for the Best IPTV Experience

  • Use a VPN for privacy and to avoid ISP throttling.

  • Connect via Ethernet instead of Wi-Fi for stable streaming.

  • Keep your apps and devices updated.

  • Use an IPTV player that supports EPG and VOD.

  • Back up your M3U playlist details to avoid reconfiguration hassles.

Conclusion

Installing IPTV on any device is easier than ever. Whether you’re using a Smart TV, Firestick, smartphone, tablet, PC, or even a gaming console, there’s a suitable app or method for you. With IPTV, you gain flexibility, affordability, and access to an endless world of content.

The steps in this Guide to Install IPTV cover the most popular devices in detail, ensuring you can get IPTV up and running without stress. Just remember the key essentials: a stable internet connection, a reliable IPTV provider, and the right app.

In a world where entertainment is increasingly digital, IPTV is the ultimate way to cut the cord and enjoy TV on your terms.

IPTV FREE TRAIL